
Admin panels help you manipulate data in real time without all of the flare of a product built on top of your endpoints. If you have some GraphQL endpoints and want to quickly perform CRUD (Create, Read, Update and Delete) operations on them without spending hours building a UI, you've come to the right place.
This post will show you how to create an admin panel with GraphQL endpoints using Retool—in less than 10 minutes. With our pre-built components, we'll both build an admin panel UI with less code, and explain how your CRUD queries work with the UI.
Let's get to it.
In this first step, we’ll focus on creating the user interface for our admin panel. Follow the steps below.
The first step in building your admin panel is to create a new app in Retool. To do this, from the top-right corner of your dashboard, click Create new > Create blank app. Give your app a name, such as "GraphQL Admin Panel."
After creating your app, you'll be taken to Retool’s drag-and-drop interface, where you'll build the UI. Retool gives you a bunch of pre-built components, which you'll see in the right-hand panel.
For this step, you only need to focus on the Table and Text components.
Click and drag the Table component from the right panel onto the canvas. Similarly, drag the Text component to give the table a title. Use Markdown to format the text size appropriately, for example, “## GraphQL Admin Panel”.
Quick tip: If you want the table to accommodate more rows, toggle on the compact mode option.
After building out the UI, the next thing to do is create your GraphQL queries. We’ll first create the resource and some queries to start with, and then link them to the UI in the next section.
The first thing you need to do is add GraphQL as a resource to your project. In the bottom panel, click New > Resource query > Create a new resource. Select GraphQL from the API list.
Now, complete your GraphQL configuration by filling in the fields shown in the image below.
Note: If you have any challenges configuring GraphQL as a resource, check out our documentation.
Next, create the four CRUD queries you’ll need. Start by clicking New > Resource Query and then selecting the resource you just created. Give your query a name and then fill out the Query field with your GraphQL query.
Quick tip: After creating one query, you can duplicate it by clicking the “...” button or pressing Cmd + D / Ctrl + D.
Check out the four examples below for the CRUD queries featured in this tutorial. Don’t worry if they don’t make sense just yet. We’ll be referencing these in the next section where we link our queries to the UI.
READ: a `listUsers` query
CREATE: an `insertUser` query
Note: Take note of the input field variable mappings in the CreateUser mutation, i.e., “$first_name: String”. Each of these input definitions will create a variable input below the query input so you can map in your input fields. Check out the GraphQL docs if you have trouble.
UPDATE: an `updateUser` query
DELETE:a `deleteUser` query
Note: Here our input field, “id”, will be populated with the “id” value from the row where the Delete button was clicked. The clicked row index will pass through to the query via the `i` variable so {{ table1.data[i].id }} will allow us to pass in this value as an input into our GraphQL query.
To successfully connect the UI to the queries, you need to understand how the queries work and how data is passed between queries and UI components. Follow the steps below to build out the rest of our admin panel functionality.
Using the query syntax shown in the image in step 2, we can query our GraphQL endpoint.
Quick Tips: You can click Preview to get a quick sample of the data returned. You can also open the Schema Browser by clicking the icon to the right of the Run button in the query pane.
One great thing about GraphQL is that we can specify only the data we need to be returned in the query. This response from our server will be referenceable as a property of the query.
For instance, our `listUsers` query will have a data property for the returned data. We can then reference this JSON object to access specific values.
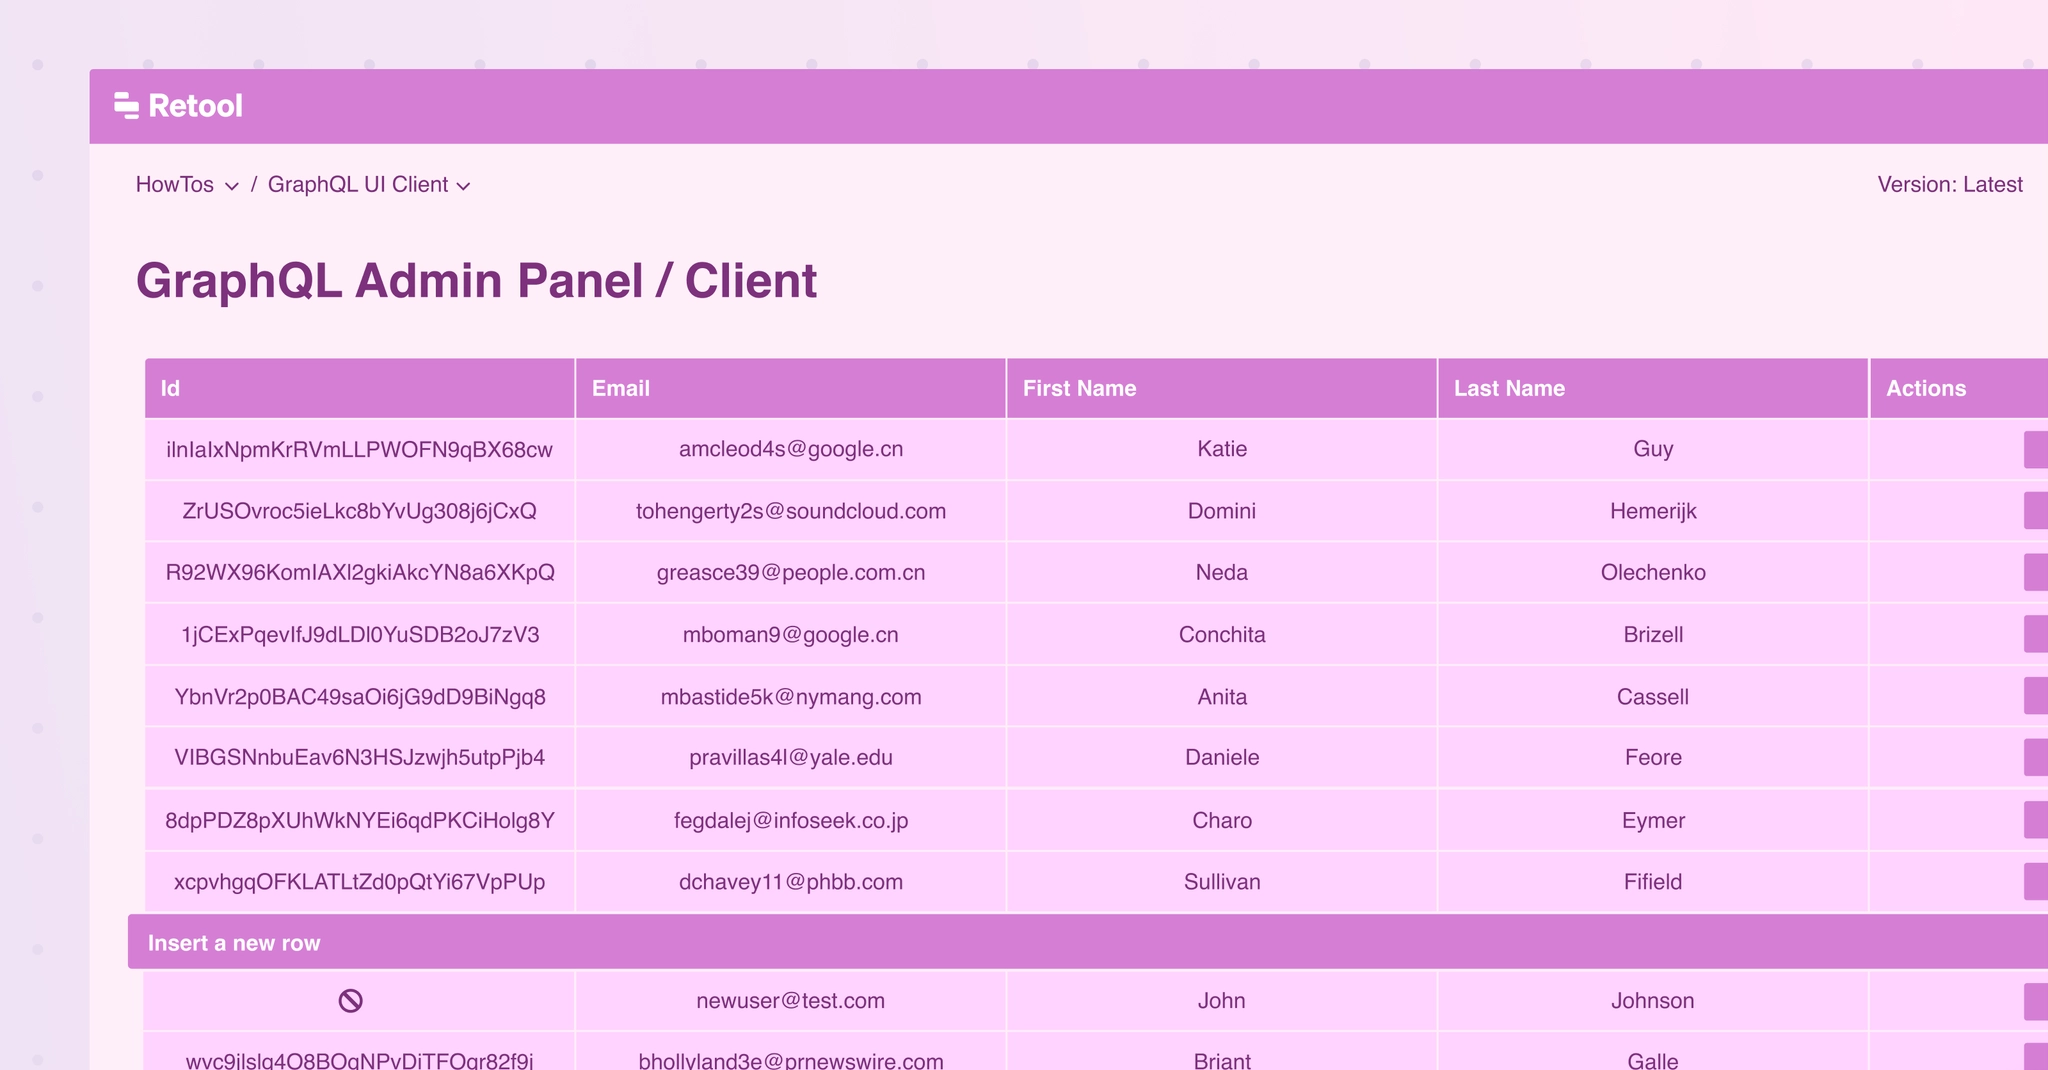
By selecting the table component we can set the Data field input in the right hand panel like so `{{ listUsers.data.users }}`. This will pass the `users` array to our Table component which will then automatically format the data into rows and columns.
Tip: You can use {{ }} almost anywhere across your application to enhance your application with JavaScript.
In order to call the `deleteUser` query, create an action button in the table: click on the new action button on the right hand panel and select `deleteUser` as the action query.
Whenever you click the delete button in a table row, the specific ID of the row passes through to the `deleteUser` query via the `i` variable. This can then be referenced as an input in the `deleteUser` query as seen below.
Now, we need to link the `updateUser` query to the changes made in the table. To do this, we'll reference the table component’s `recordUpdates` property, which will be a set of changed rows from the table in object format. This means that when the values in this table are updated, they populate to a property called `recordUpdates`, which will be an array of the changes in that table.
Remember: In order to make changes to a table component’s data, you need to change each column’s settings in that table to enable editing.
Notice in the image above that we are only referencing the first item in the `recordUpdates` array in order to update one user. If you want to update many users at one time, you can create a JavaScript query but we will not be covering that in this tutorial.
Quick tip: One helpful way to learn about components properties and methods is to open the left-hand panel and inspect the various properties for that component.
Next, we'll reference those changes and pass them into this mutation to update users via the primary key like below:
Lastly, we’ll need to create an “Event Handler” in the right hand panel of the Table component in order to link the “Save Changes” button to the `updateUser` query.
The `insertUser` query grabs the values typed into a new row in the table by pressing the “+” button in the bottom right of the Table component.
When the plus button is pressed, the user can type in values for each of the columns in the table. These values will populate to the `newRow` property table which can then be referenced in the GraphQL query.
Lastly, you’ll need to add an Event Handler to the table component, and reference the “Save new” event, linking it to the `insertUser` query in order to link the new row button to your query.
That's it, folks! You’ve just successfully created your GraphQL admin panel. Now, you can perform CRUD operations on your dataset without any hassle. Give your app a test run and if you have any trouble, join the Retool community where you can get help from experienced users, and, of course, Retool.