

Before the advent of the spreadsheet back in 1979, people didn't really understand what the personal computer was for. Since then, spreadsheets have come a long way — they've powered businesses across the world, and they're the de-facto way for anyone to quickly program a computer.
While spreadsheet software has evolved over the years — first VisiCalc, then Lotus, Excel and now Google Sheets — the core abstractions have remained the same. They’re flexible, intuitive, and timeless.
But these abstractions make spreadsheets bad at certain tasks. In particular, entering data is error-prone (no validation), building interactive interfaces is cumbersome, and connecting to other data is difficult. You could get a spreadsheet to do almost anything, but you probably shouldn't.
Retool fills in those gaps. You can build apps on top of the data you have in Sheets with Retool. It lets you create polished UIs by dragging and dropping commonly-used components like TextInputs (which are much better for data entry). And your apps can connect to almost any data source (so you can connect Sheets data with to any other API).
Let’s build an app that:
- Reads a table of data from Google Sheets (returns from our warehouse)
- Augments each row from Google Sheets with data from a database (get emails for each return)
- Triggers an API request for each row (send out an email acknowledging receipt of the return)
This takes about 5 minutes in Retool, and requires very little code. Sign up to Retool here to follow along.
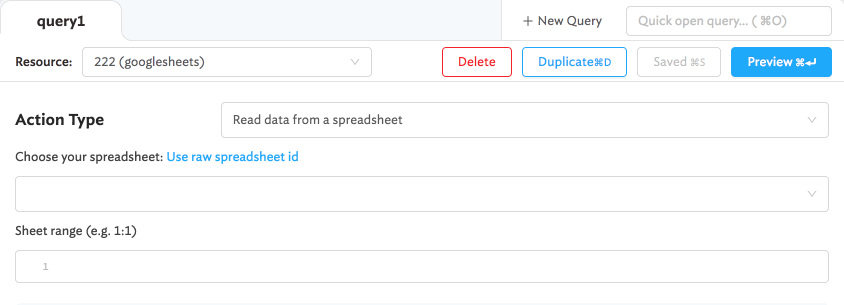
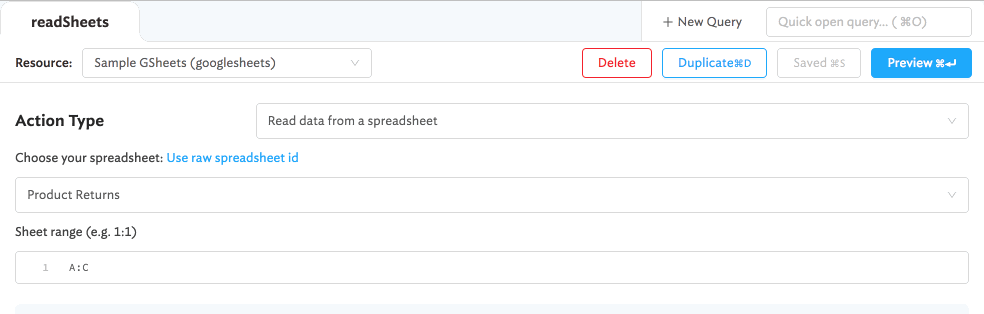
Retool integrates with any database (SQL or no-SQL) and API, and has native integrations with dozens of products and services, like Google Sheets. You can connect to your own Sheets by creating a new Google Sheets resource in Retool, but for now, let’s use our sample resource.
- Select the Sample GSheets resource from the dropdown.
- Select the Product Returns spreadsheet from the dropdown.
- Enter the sheet range. We’ll be using A:C.
- Save the query, and rename it to something descriptive, like readSheets.
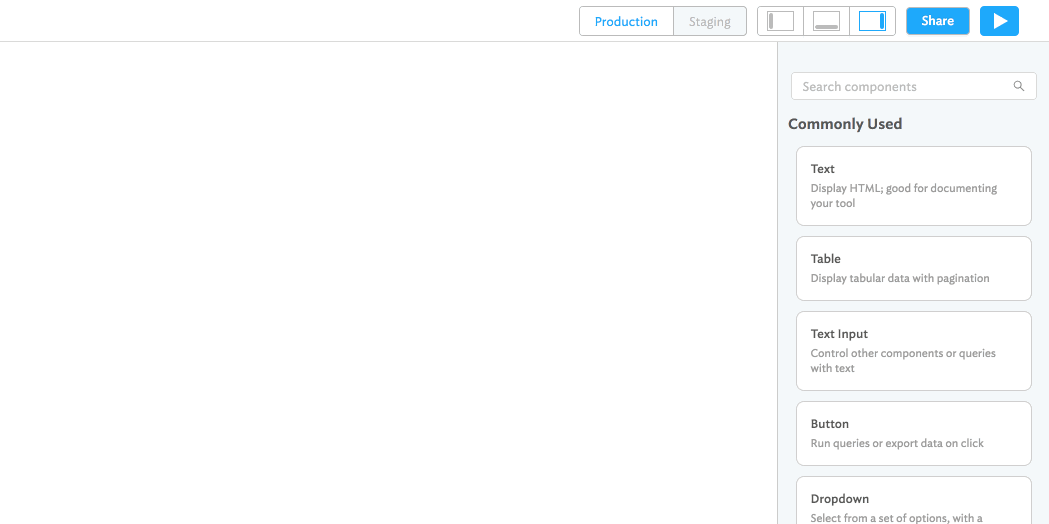
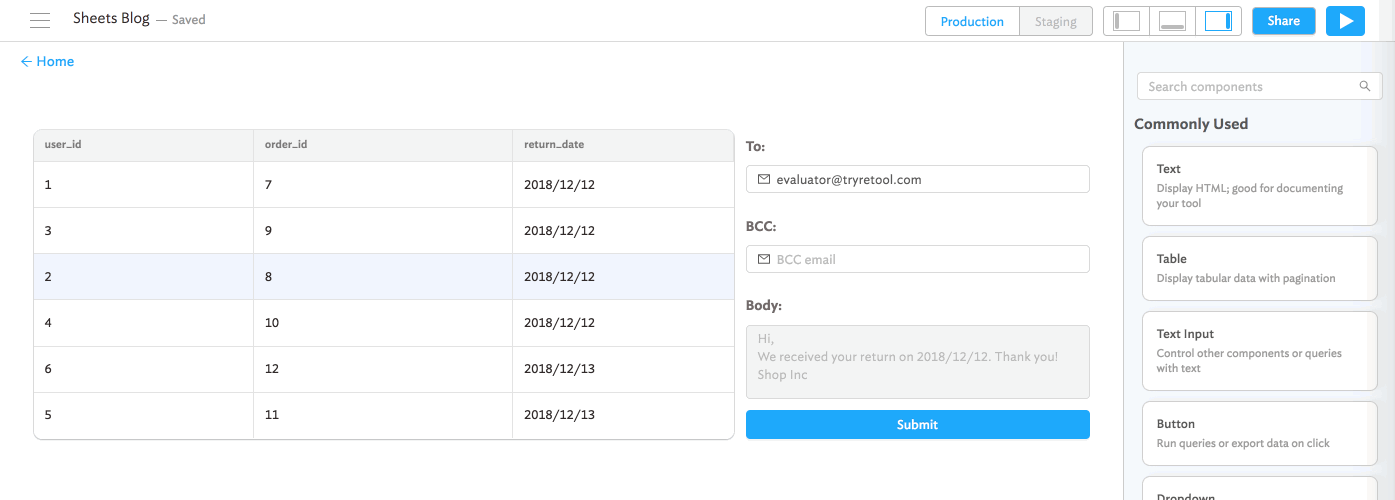
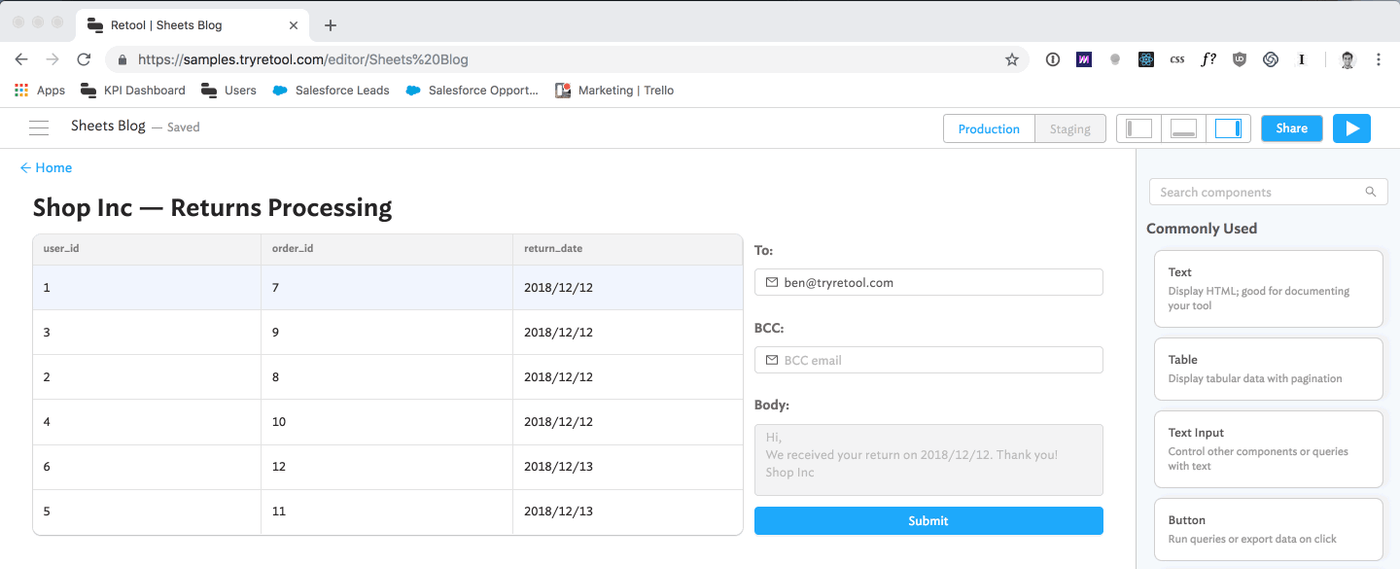
Retool has ready-made components that can display data however you want. You can combine and arrange components to create custom interfaces for your own apps. For now, let’s show our Sheets data in a table.
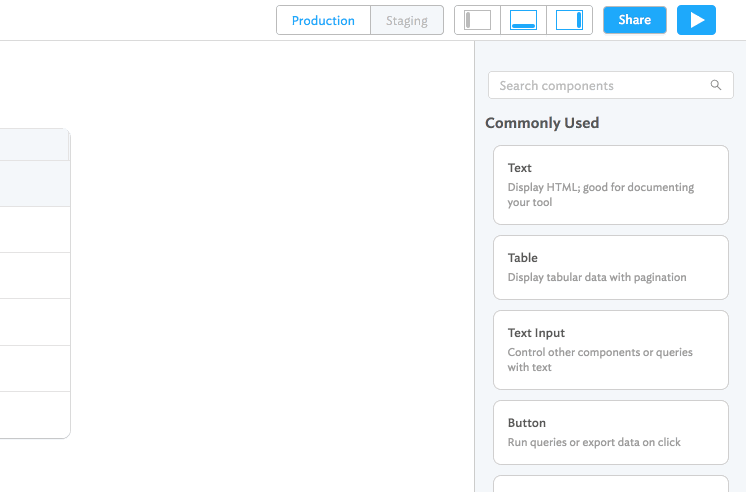
- Drag on a Table component from the Components list on the left-hand-side.
- Rename it to
returnsTable, so we can refer to it later. (You could refer to it later as justtable1, but in this guide we’ll assume you renamed it) - The data in the table will be pre-filled with the results of your last query:
{{ readSheets.data }}.
Everything inside Retool is a variable that you can refer anywhere else: readSheets is a query, and returnsTable is a Table. Variables also have fields you can access: like readSheets.data, and returnsTable.selectedRow.data.columnName. We’ll learn more about this in a bit…
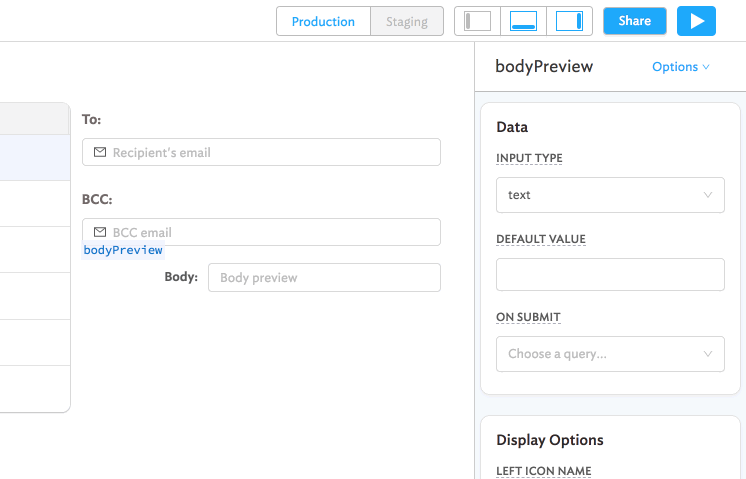
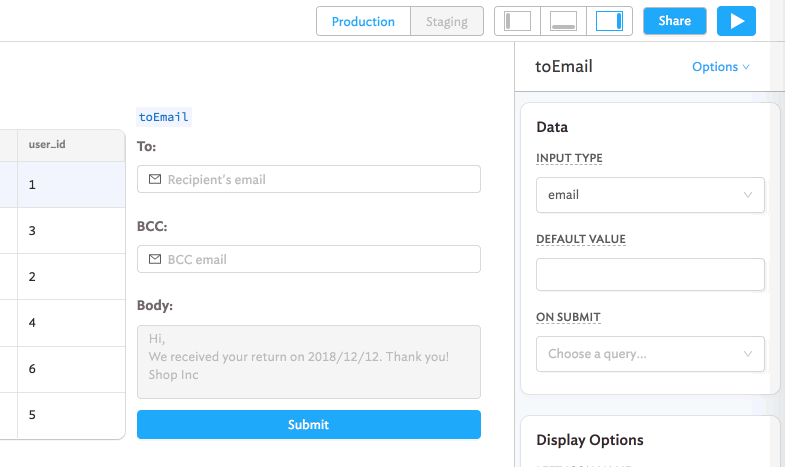
Retool also has components for data entry — from text inputs to JSON editors. For now, let’s build a quick form to send emails to customers, notifying them that we’ve received their return.
We want to be able to select a row in our returnsTable and then easily send an email to the customer. So we need a “To” field for the customer’s email, a “BCC” field where we can enter our own email, and a “Body” field where we can preview the message to be sent.
- Drag on a Text Input component from the Components list on the left-hand-side.
- Customize its properties for it to act as a “To” field:
- Change the Input Type to email — this will add email validation to the field.
- Change the Left Icon Name to mail.
- Change the Placeholder and Label to something descriptive.
- Repeat steps 1 and 2 to create a “BCC” field.
- Repeat and modify steps 1 and 2 to create a “Body” field. Resize the text input to be at least 3 units tall to turn it into a multi-line text area.
- Drag on a Button component to act as the trigger that sends our email.
****
Form looks good! But let’s add a couple of things to make our email workflow better:
- A custom preview of the email body based on the return date
- Auto-fill the “To” field with the selected user’s email address
Just like how our first query had a data property (query1.data), our table has a selectedRow property. Whenever we change the selected row in the Table , this variable will automatically change.
This lets us have auto-fill our email body with some variables depending on which row is selected. To access the return_date, for example, we can just use: {{ returnsTable.selectedRow.data.return_date }}. Now let’s put this inside of our body:
Now we just need to put this template into the “Body”. To do that, let’s:
- Select the “Body”
TextInput, and go to its Default value property on the left-hand-side. - Change it to:
1Hi,
2
3We received your return on {{ returnsTable.selectedRow.data.return_date }}. Thank you!
4
5Shop Inc
6- Navigate to the Disabled? property, and put
trueas its value. This prevents end-users from editing the email that we send.

If you select a different row of the table, the TextInput will automatically update to use the new return date. Nice!
Retool lets you connect to multiple data sources from the same app. This lets you combine Google Sheets data with other sources, like databases or APIs.
In our use case, let’s fetch a selected user’s email from our sample PostgreSQL database. (Imagine that our Google Sheets that the return warehouse produces doesn’t have the customers’ emails — it only has their user ID.)
Just like how we got the return date of the selected row we can get the user_id of the selected row:
- Press the New Query button.
- Select onboarding_db (readonly) from the “Resource” dropdown.
- Write the following SQL query to find the email corresponding to the user_id in the selected row of the table. You can press Preview to check whether it works. select email from users where id = {{ returnsTable.selectedRow.data.user_id }}
- Save the query, and rename it to something descriptive, like getEmail.
If you select a different row of the table, this query will automatically re-run to fetch the email corresponding to the new selected row.
Now, let’s set the “To” field to auto-fill using the result of this query.
- Click on the “To” field component and navigate to the Default value property.
- Enter the following:
{{ getEmail.data.email[0] }}
Nice! When we change the selected row, the query to get that row’s email automatically runs, and fills in the data in our TextInput.
Retool connects to practically any API, like Stripe, Quickbooks, or any one you’ve written yourself.
In this case, we have a sample API set up with an endpoint that lets you send return acknowledgement emails. The API already has our email body template, so all we need to do is send our specific parameters. Let’s set up a query to do this.
- Press the New Query button.
- Select onboarding_api (restapi) from the “Resource” dropdown.
- Select POST from the “Method” dropdown, and enter this as the endpoint:
emails/returns/new. - Navigate to the “Body” section of the query editor, and enter the following key → value pairs as the request parameters:
- to →
{{ toEmail.value }} - bcc →
{{ bccEmail.value }} - return_date →
{{ returnsTable.selectedRow.data.return_date }}
- to →
- Save the query and rename it to something descriptive, like sendEmail.
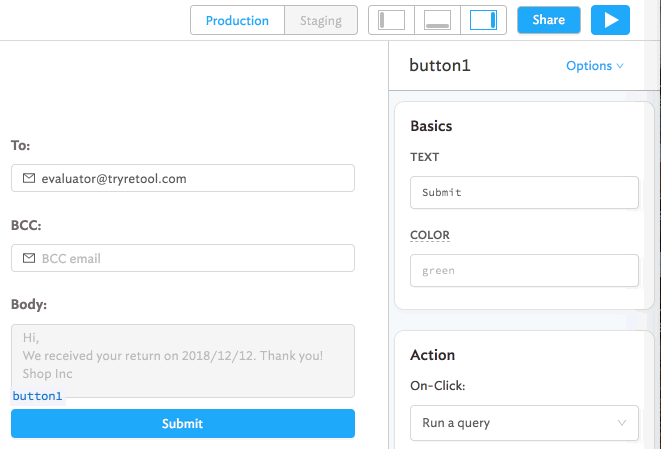
All that’s left is to hook the query up to the button, so that pressing the button triggers the API request we’ve specified:
- Select the button, and navigate to the “Action” section of its properties.
- Select Run a query from the first dropdown, and select your sendEmail query from the next dropdown.
Retool lets you customize your app to make it your own. You can use the Text components to enter arbitrary HTML or Markdown, as well as custom styles using CSS. For now, let’s use Markdown to give our app a title.
- Drag on a Text Input component from the Components list on the left-hand-side.
- Enter your desired title in the component’s Value property. Prepend
###to turn it into a heading.
Press the Play button in the top-right to enter End-user Mode, from which you can use your app. You can send a link to this page to others on your team, letting them use it too.
This is a simple app that covers the basics of what Retool can do with Google Sheets. Retool also supports writing back to Google Sheets, build more complex interfaces that can search, filter, and drill down into data, etc.
Google Sheets is the lowest-friction way to start entering and storing data online. Retool lets you turn these into fully-fledged apps, which can grow with your business, much more than a spreadsheet can.
Sign up for a free account here: https://retool.com/
Check out another Retool + Sheets app and tutorial here: https://retool.com/blog/google-sheets/