

Ah, Postgres. With origins dating back to the mid-1980s, the open-source, general-purpose database with support for atomic transactions, triggers, foreign keys, materialized views, and stored procedures has had plenty of time to solidify itself as one of the most popular databases in the world
Indeed, today Postgres has a massive and growing community with adoption in many commercial-grade software stacks. And it’s continued to evolve, introducing variants for analytical workloads and LLM vectors.
But one thing that hasn’t quite emerged is the perfect off-the-shelf Postgres GUI to manage the database and simplify writing SQL (or PSQL, Postgres’s SQL variant). While there are many Excel-spreadsheet-like options available, developers often want to craft more robust, bespoke interfaces designed around a company’s internal needs.
Today, I’ll show you how I like to create GUI tools for Postgres.
One benefit of building a GUI is that both developers and non-developers can manage a database’s data, with complex SQL queries replaced by digestible UI modals. This isn’t a knock at SQL—SQL is an exceptionally useful language, but it’s very technical and some who folks who need to access data find SQL a bit difficult to learn. Implementing a GUI can enable developers to execute repeatable SQL procedures without exposing the SQL to the database administrator.
Of course, a GUI is also only as good as its design and engineering. A simple GUI may be akin to a spreadsheet that maps to the database system. However, a great GUI safeguards users from making accidental edits and helps them learn core business procedures. For instance, a ticket-issuing company might want a GUI that enables customer service to cancel tickets or re-issue tickets to attendees.
A bespoke PostgreSQL database GUI has three parts:
- A Postgres connection, typically with read/write access
- PostgreSQL statements that carry out changes in the database
- UI components that trigger those Postgres operations
An ideal end result is an intuitive, usable interface for managing data in a database. The GUI can be designed to enable both technical and non-technical users to easily visualize data in formats beyond tables and make complex changes. (For instance, a PostgreSQL GUI might have a single button that changes multiple values across rows.)
To build your own PostgreSQL GUI, we’re going to use an internal tools platform to avoid sinking time into building frontend components from scratch. I’m using Retool for this tutorial given its advanced feature set, though the same principles can apply no matter how you opt to build your GUI.
Postgres databases have endpoints that can be accessed by user accounts (safeguarded with a username and password). For instance, a Postgres database server might have something that looks like the following:
1Host Port: 5432
2Host Username: internal-app
3Host Password: duas89u3quqa-0a98duGather your Postgres database endpoint from your cloud provider. Amongst the main providers, this is offered as RDS in AWS, Cloud SQL in GCP, and Azure Database in Azure. Alternatively, if you use AWS, you can use an IAM role for access instead of a username and password.
Databases are often safeguarded by firewalls to prevent unauthorized access. As a result, you might need to set an IP range that’s permissible for endpoint access. For Retool, these endpoints are:
135.90.103.132/30
244.208.168.68/30Using a connection endpoint, the Postgres database can talk to the internal app software. With our on-hand database information, we can sign in to our internal app software—Retool, in this case—and initialize a new resource.
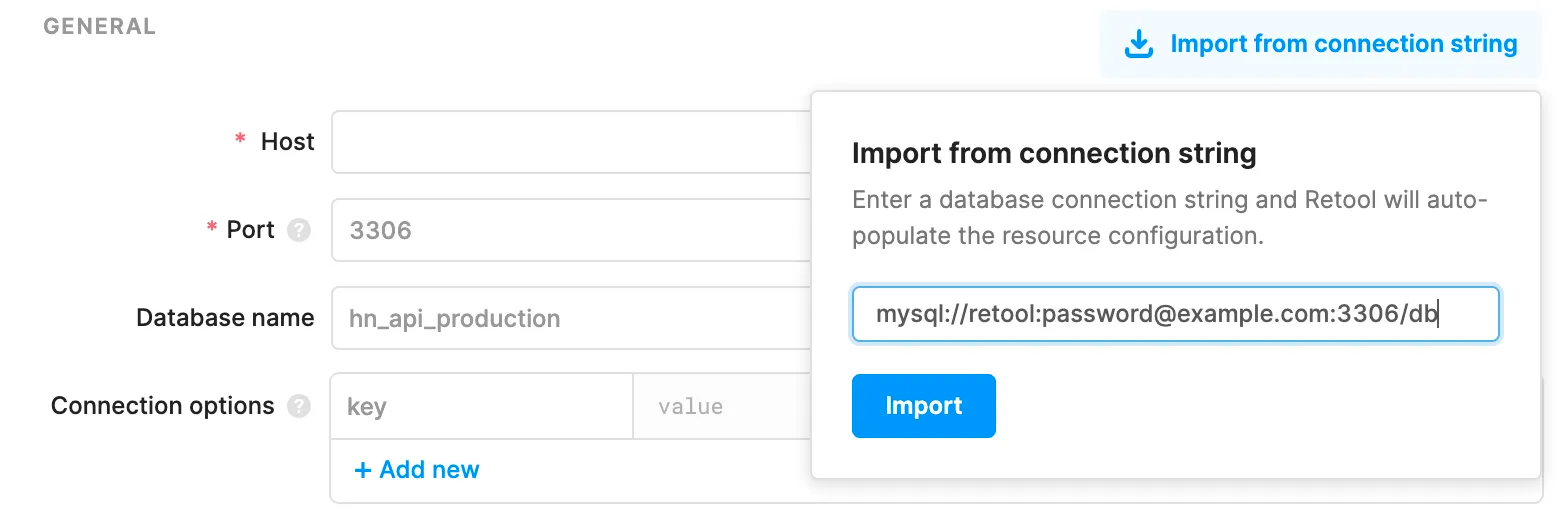
We can set up a Postgres resource connection from the menu under the Resources tab.
From here, we can enter our connection string, or we can manually enter in the core fields such as the hostname, username, and password.
If you hit an error, don’t fret. Check whether you’ve covered your bases:
- Has your IP whitelists been correctly set?
- Did you enable SSL for a secure connection?
- Are you username, password, and database correct?
- Is the host URL formatted right?
- Are you using the right port number?
Once you have a successful connection, you’re set. Now, we have a data source that we can query from within our GUI.
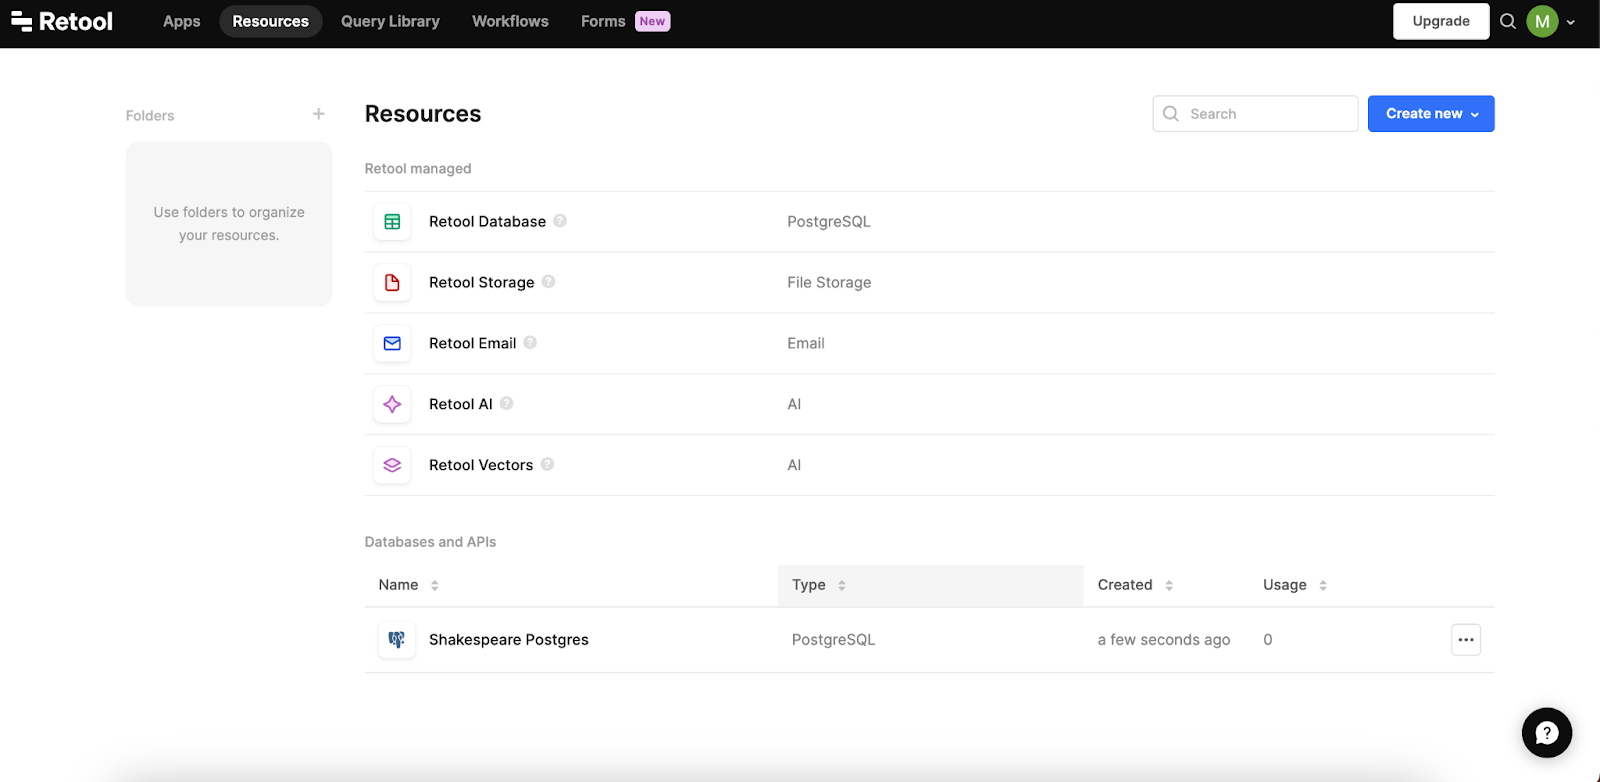
This tutorial will use a test database; specifically, the Postgres port of an open-source database detailing all of Shakespeare’s works. You are welcome to use the same database to follow along query by query. Alternatively, you can apply the principles of this tutorial to your own Postgres database.
In Retool, create an app (if you don’t already have one).
(Milestone moment, accomplished!)

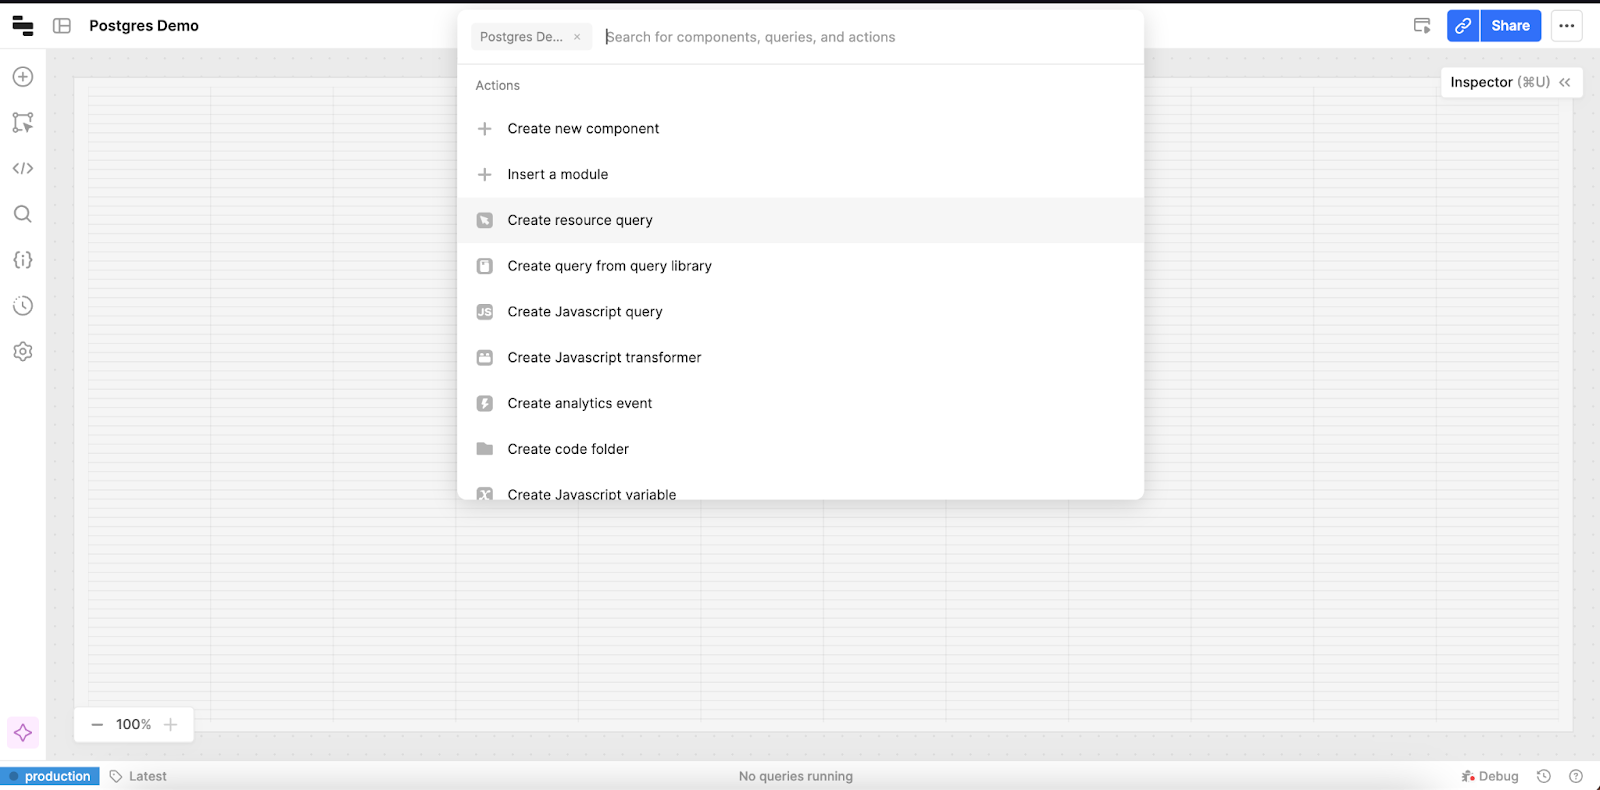
Next, we need to create a resource query that we can use to populate our future UI components. It’s best to create the resource query first, then the components—on platforms like Retool, the components will be automatically configured based on the preceding query.
Let’s initialize a resource query from the menu:
We’ll use the characters table from our Shakespeare database. We’ll simply select all the data, including all the table fields.
Let’s run that query to ensure that it works!
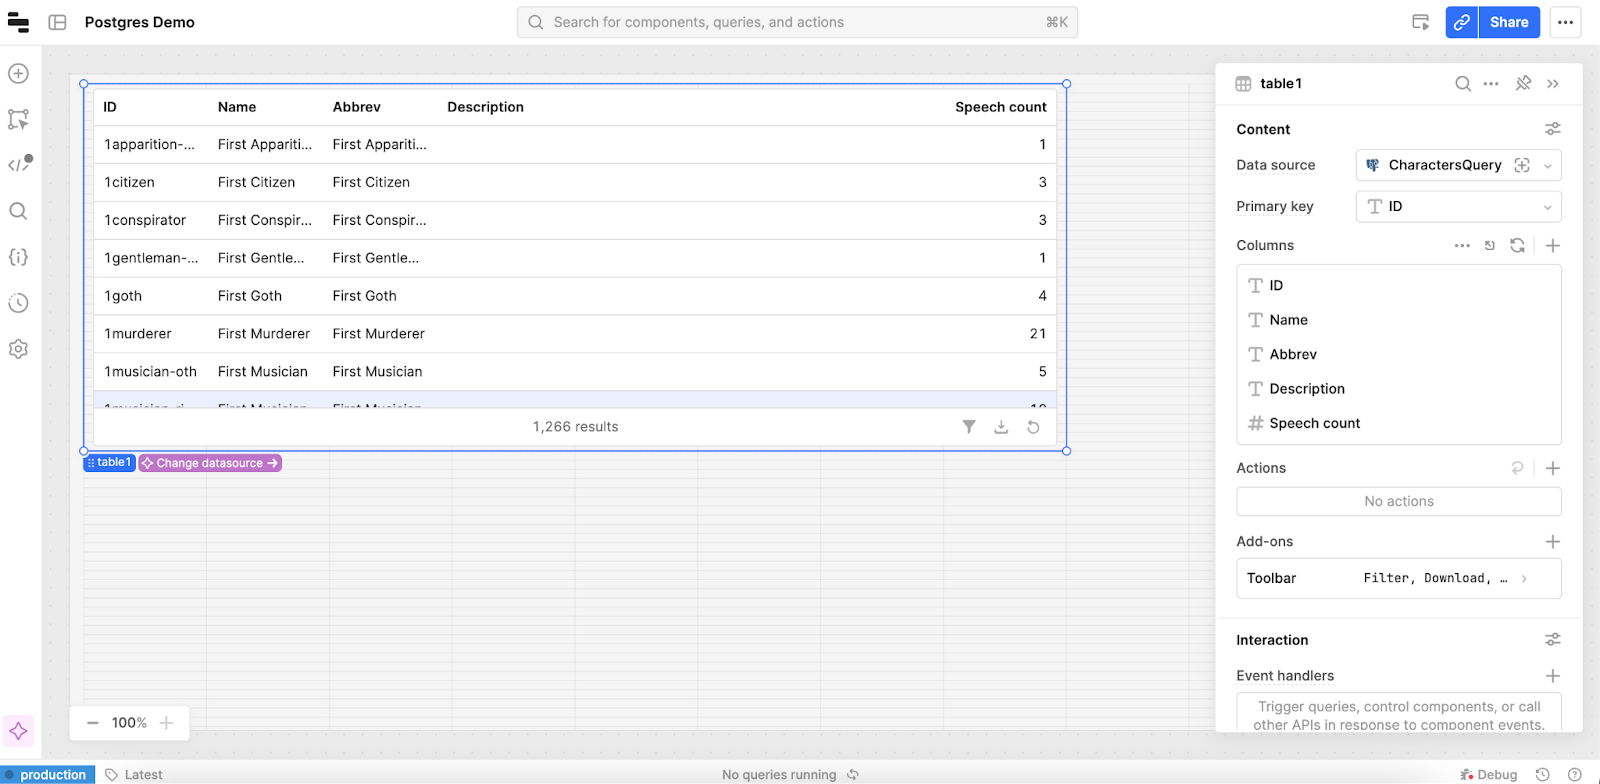
Now that we have a working query, we need to feed it into a component. Given that we did a generic SELECT query, we’ll use a UI table to display the data in spreadsheet format. Conveniently, there’s a Retool prebuilt component made for this task:
After dragging a Table component into the center of the canvas, it will automatically display the data with the columns mapped. You can customize the table using the options in the right-hand column.
Next, let’s do a bit of housekeeping and set the table name. This is important so that we can easily recognize it in our future queries.
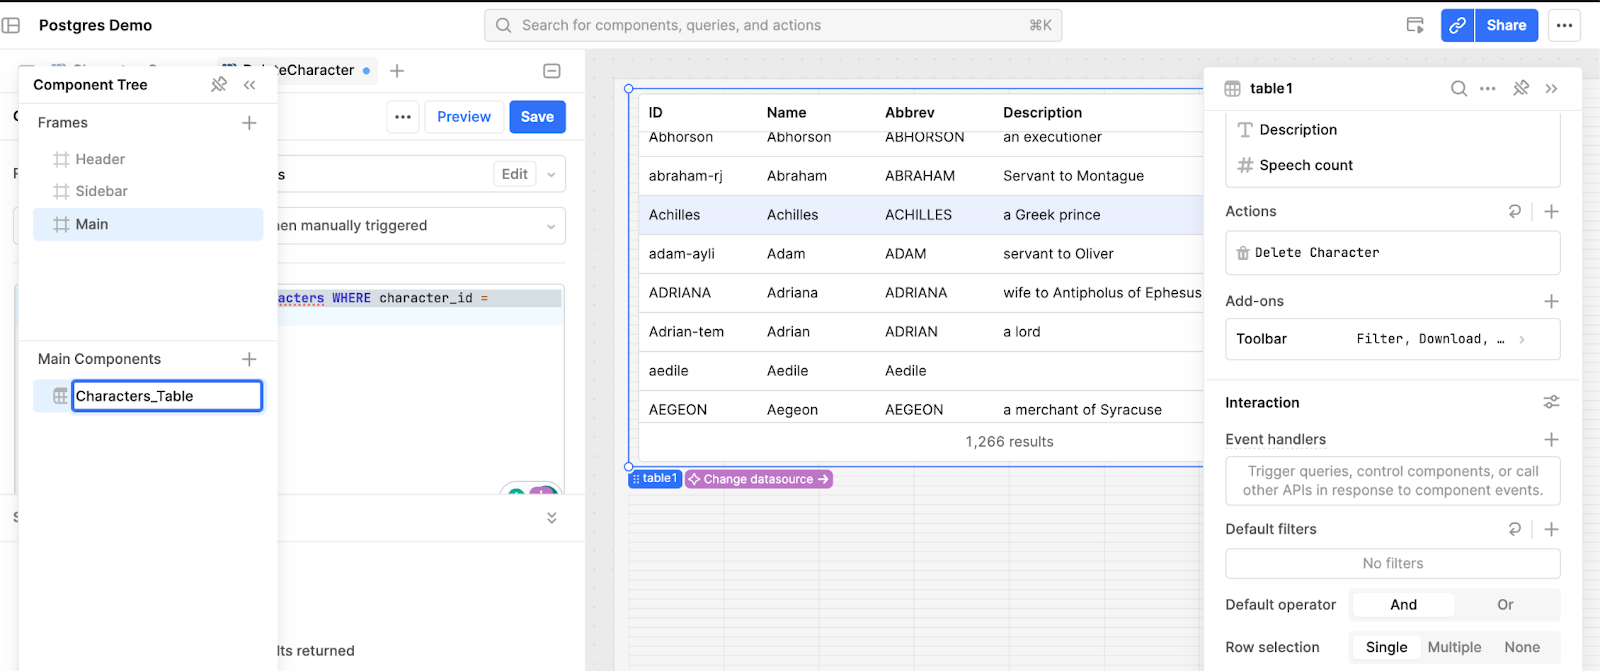
Displaying data is great—but being able to change that data is exciting. We’ll accomplish this with another query that does a write action. For starters, let’s add a trash can delete button to each row entry to easily delete data!
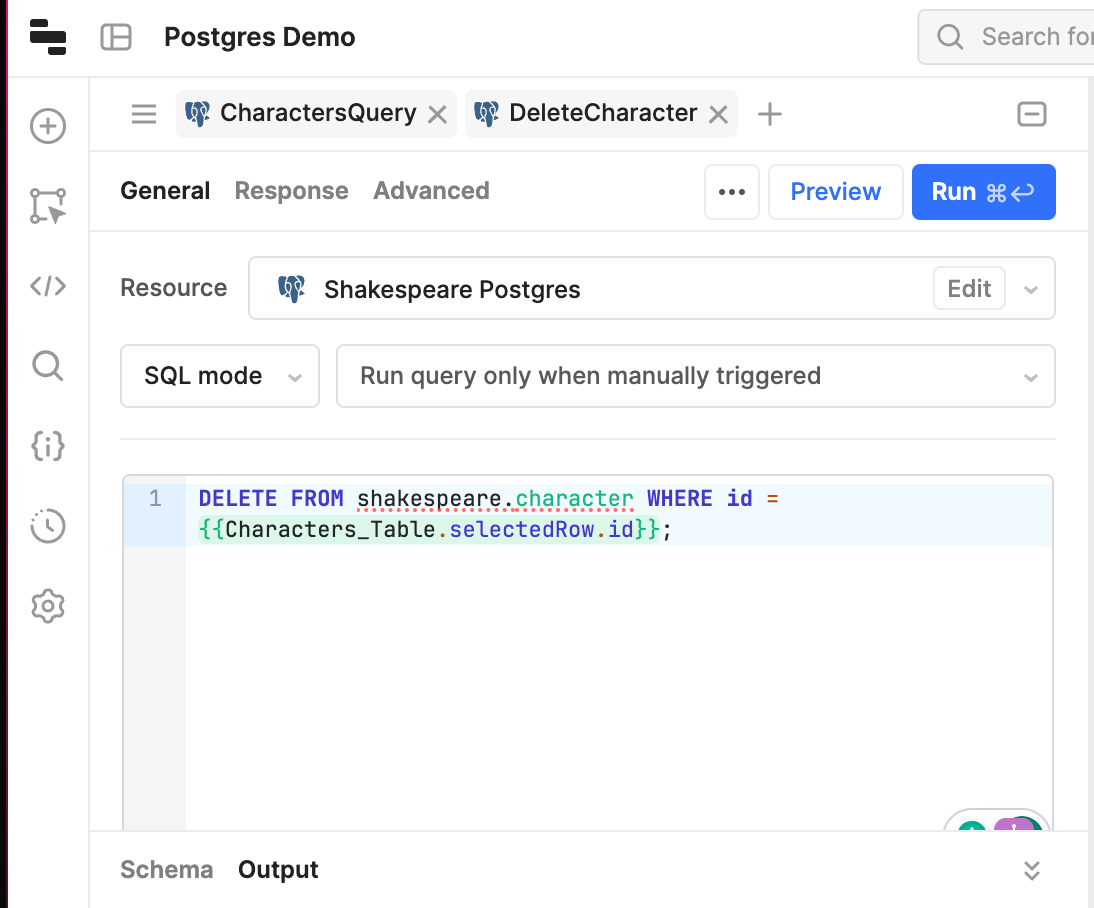
First, we’ll need to set up the query that tells the database to delete the selected row. Thankfully, this is easy by using the prebuilt selectedRow feature on Retool, which enables us to write a WHERE clause to ensure we’re deleting the right row, identified via the id field.
Next, we’ll use Retool’s built-in Actions list to set up an action button. We’ll connect this Action button with the query we just created—because you end up selecting the row when clicking on the button, the Delete feature will work seamlessly:
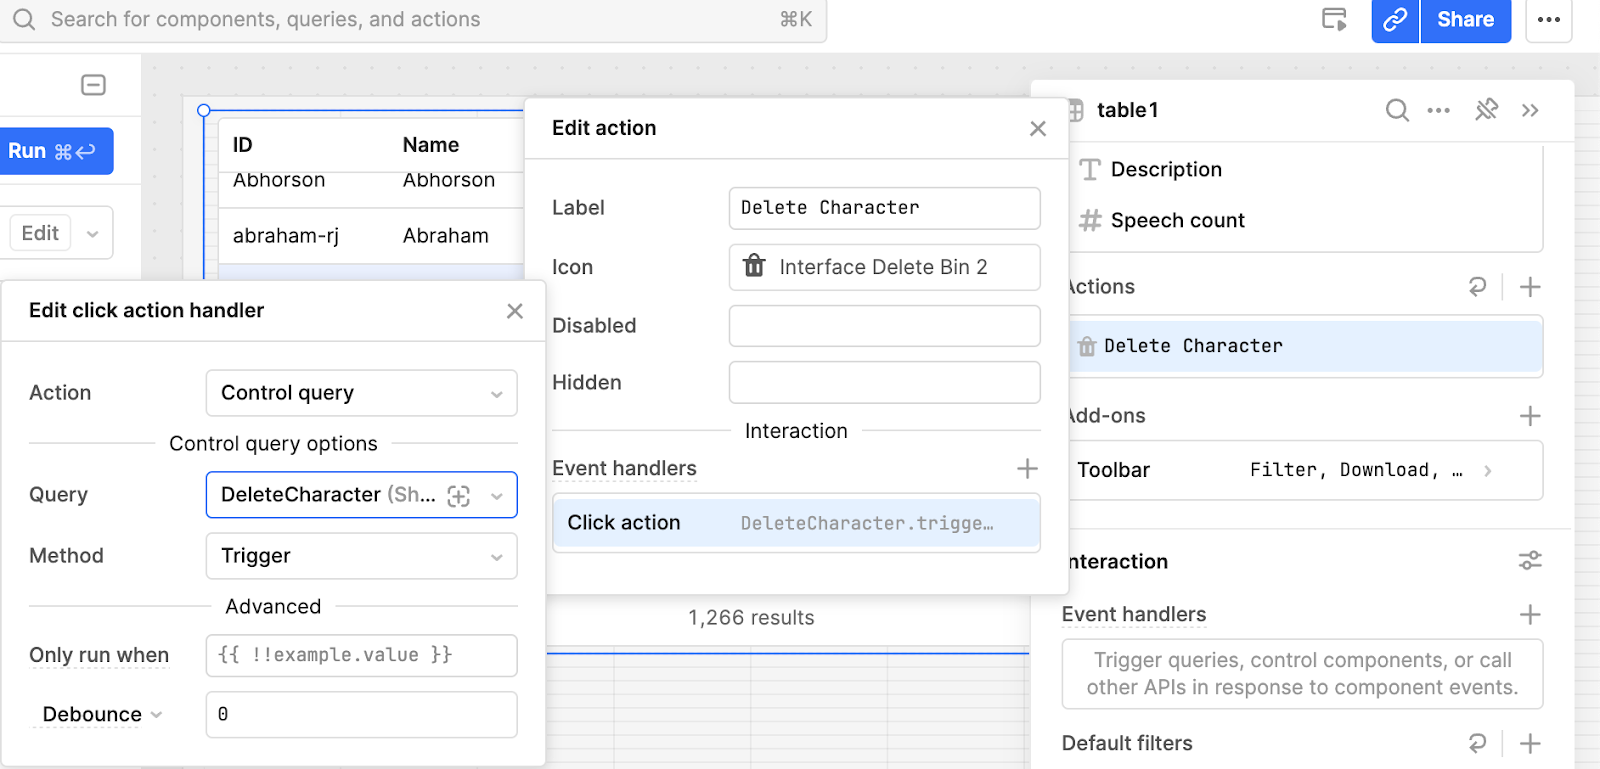
And just like that, we have our first read-write component in our Postgres GUI.
Revisiting the comparison we made in the last section, deleting data is cool, but editing data is powerful! And there are plenty of reasons to edit data—to fix mistakes, answer customer service tickets, or other maintenance tasks such as marking an order entity as fulfilled.
The first step of editing data is a bulk update query. A bulk update query is a special query that updates multiple rows of data in a provided array of id database objects.
If you’re using Retool, just create a new query, name it, and set the Action type to Bulk update via a primary key. Then, set the Primary key to id and the array of records to update to your table’s changesetArray (e.g. {{Characters_Table.changesetArray}}). This is a Retool-managed array that tracks all the changes to a table.
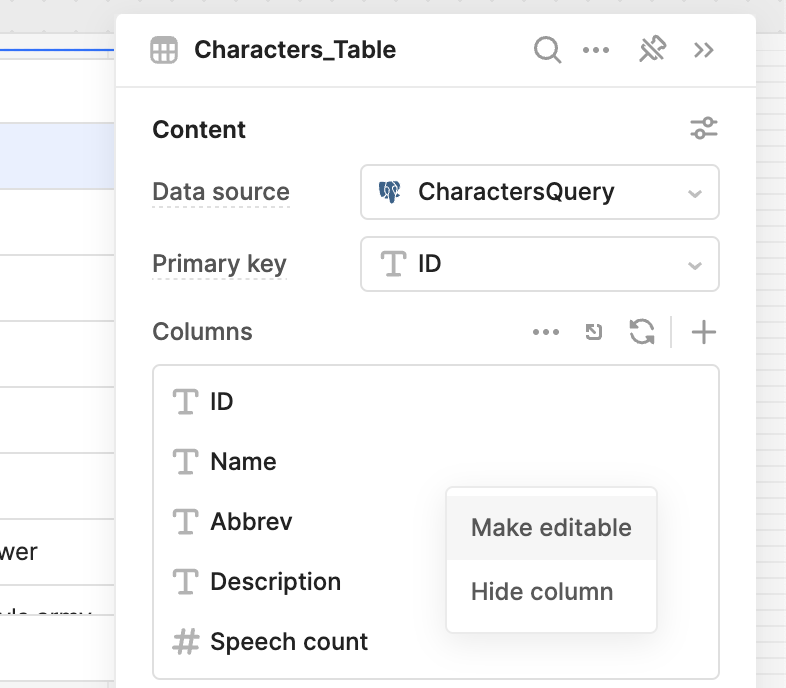
Now, we have a bulk edit query! Next, we need to set the relevant columns that we want to be editable as (...wait for it…) editable in Retool. This is easy to do using the three-dot menu.
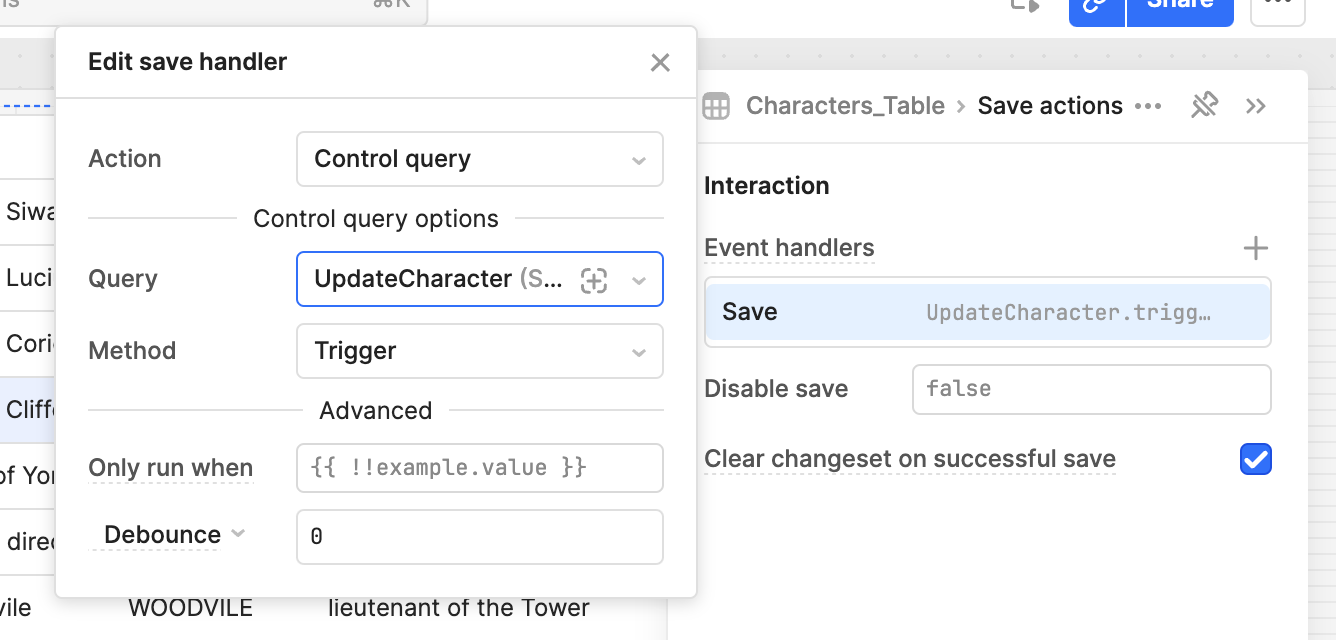
After setting the right columns to editable, we need to connect the query to changes to the table. This is easy to do by creating a Save actions trigger on Add-ons.
We then simply set it to run the UpdateCharacter query we just wrote.
And voilà! We can now edit (multiple) table entries and those changes will write to the database.
The last major item to make our Retool app the ultimate Postgres GUI is a feature to add a new row. We can make this happen with two user interface components—a text box to set the new row’s ID and a button to create the row.
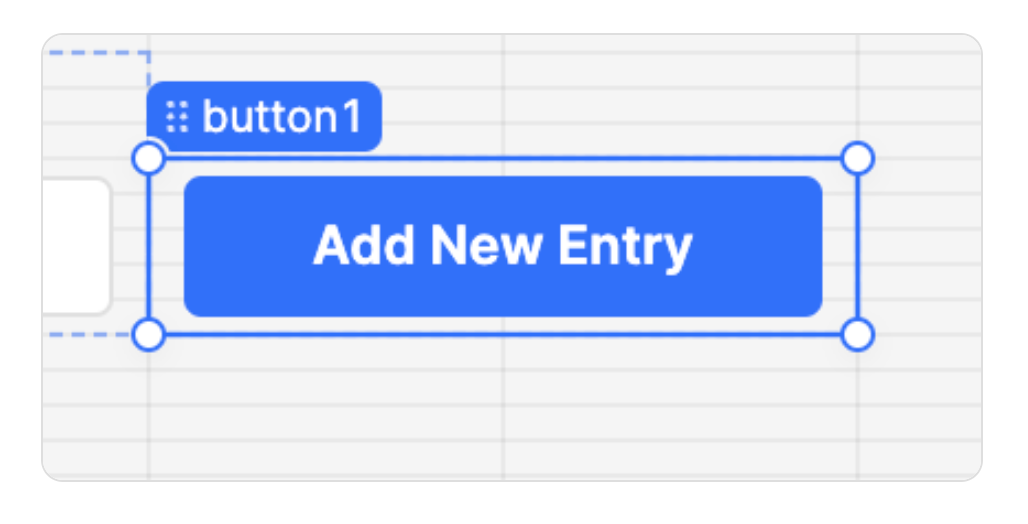
First, we create a new Button component. (Head right back to the Components menu we used to make our Table component.)
We can give it some text like Add New Entry.
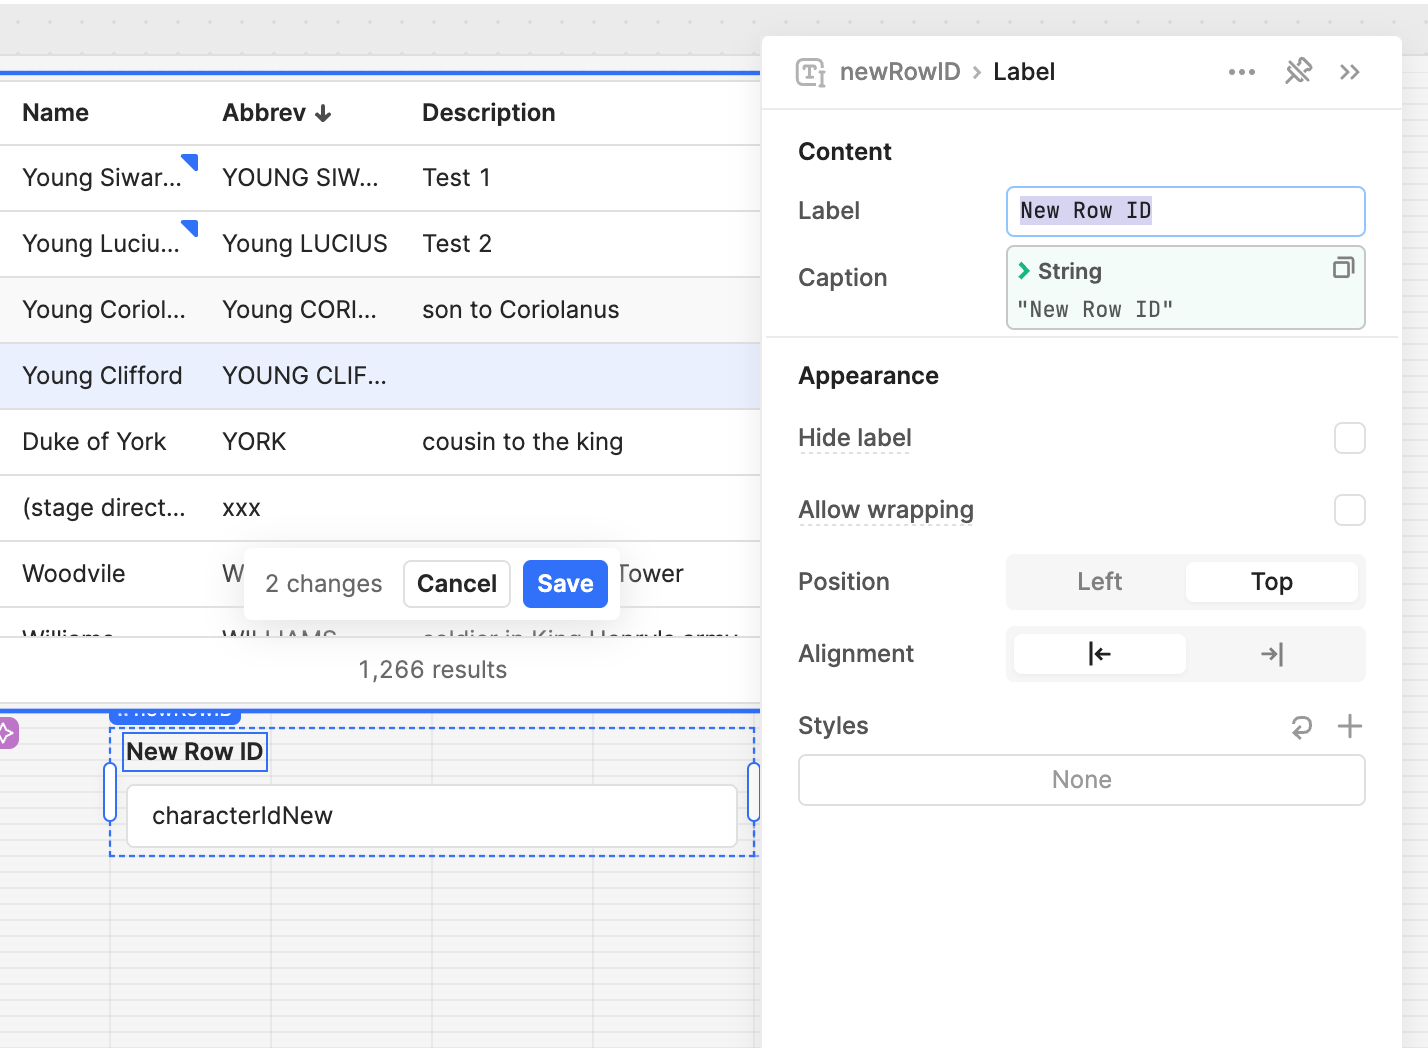
Next, we add a Text Input component. (Back to that Components menu again!)
We’ll give this a proper name so it’s easy to reference, and an accurate label, such as “New Row ID”:
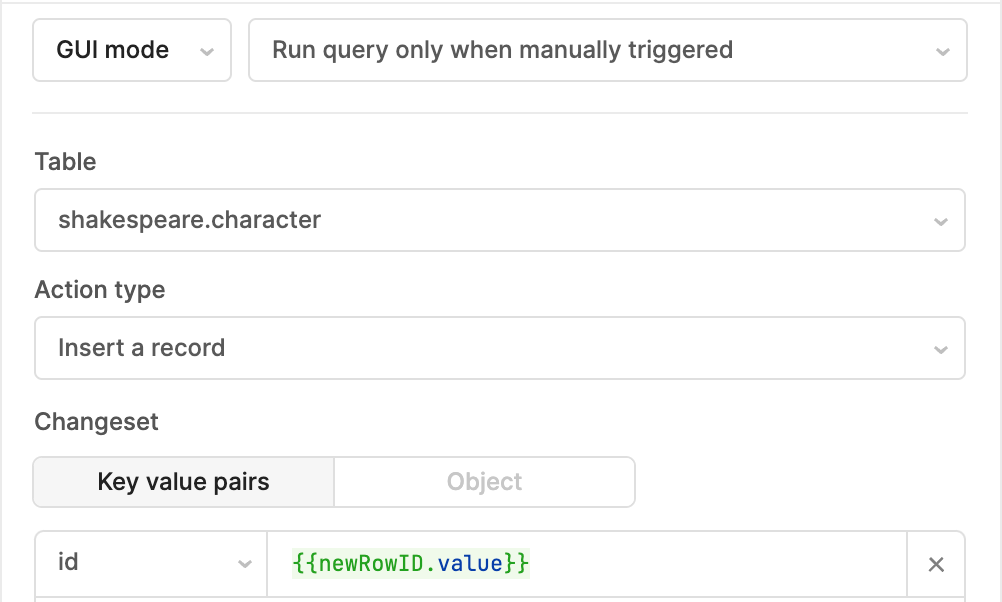
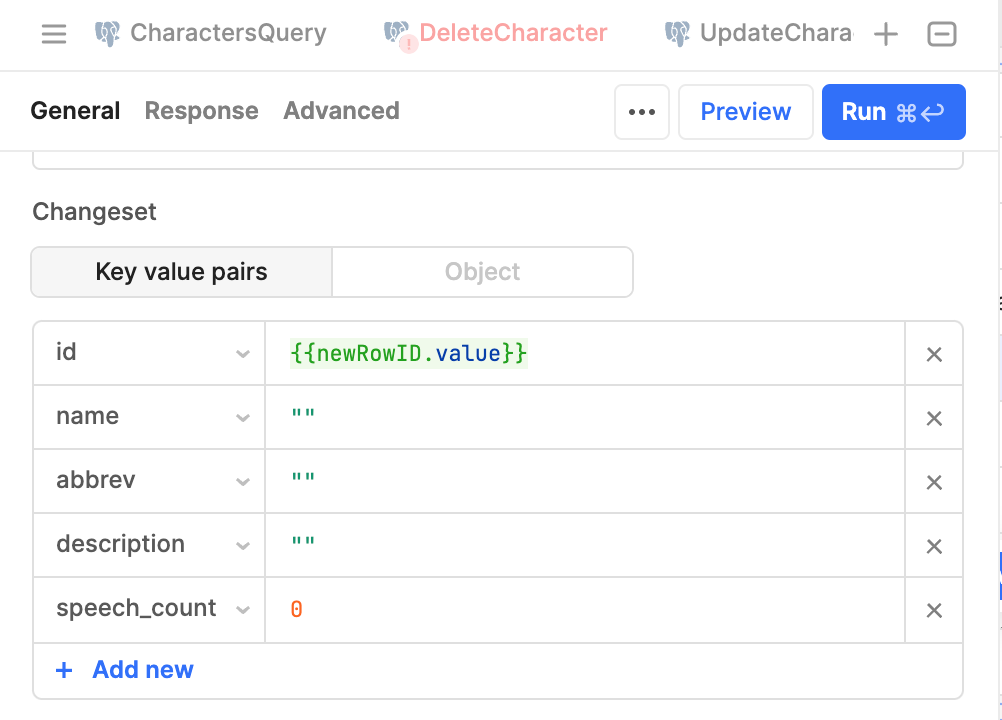
Next, we’ll create another query. We’ll set the table to the character’s table, the action type to inserting a record, and the changeset a single value for the id set to the newRowID.value.
Now when you click on the button, it adds a blank row with the id set to whatever the textbox is. Of course, this will only work if the Postgres table has default values. If it doesn’t have default values, we could assign the default values to empty strings in the query’s Changeset section.
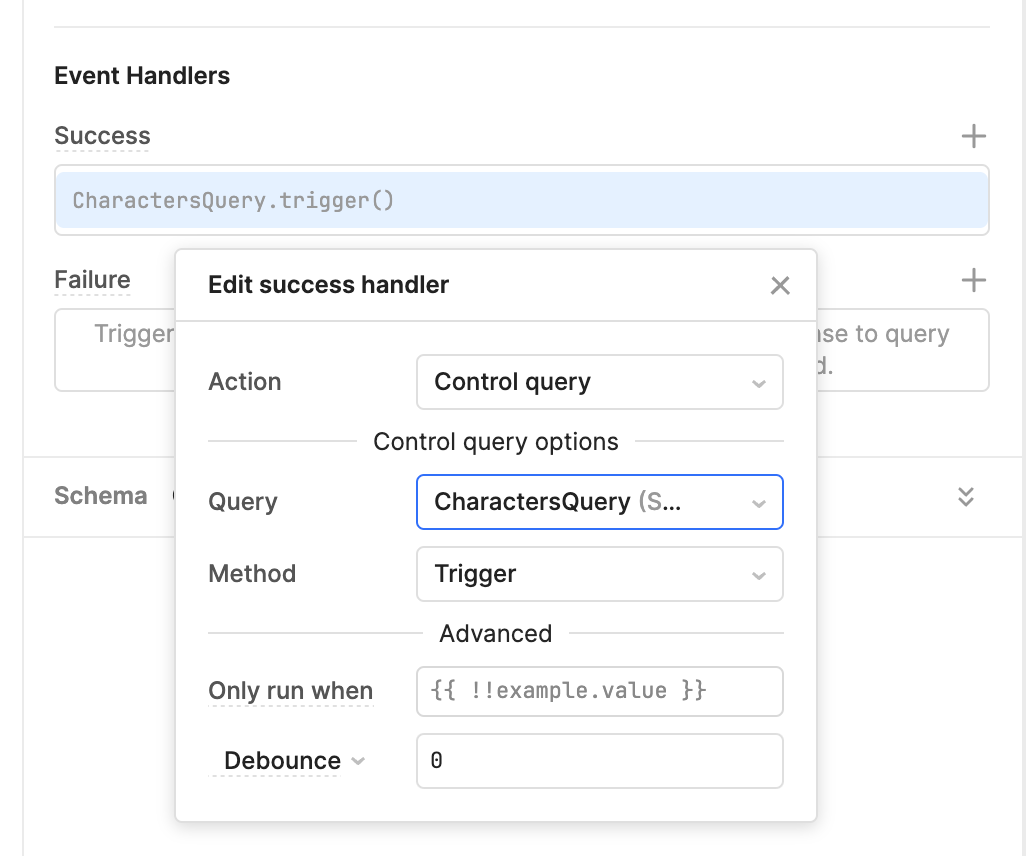
But this only makes the change to the Postgres table, not the local table! We can fix thisby setting CharactersQuery to fire on the InsertCharacter’s success:
Finally, to make our app a little easier to use, we can add another success handler that wipes our input field of the previous ID, given that it’s already been used!
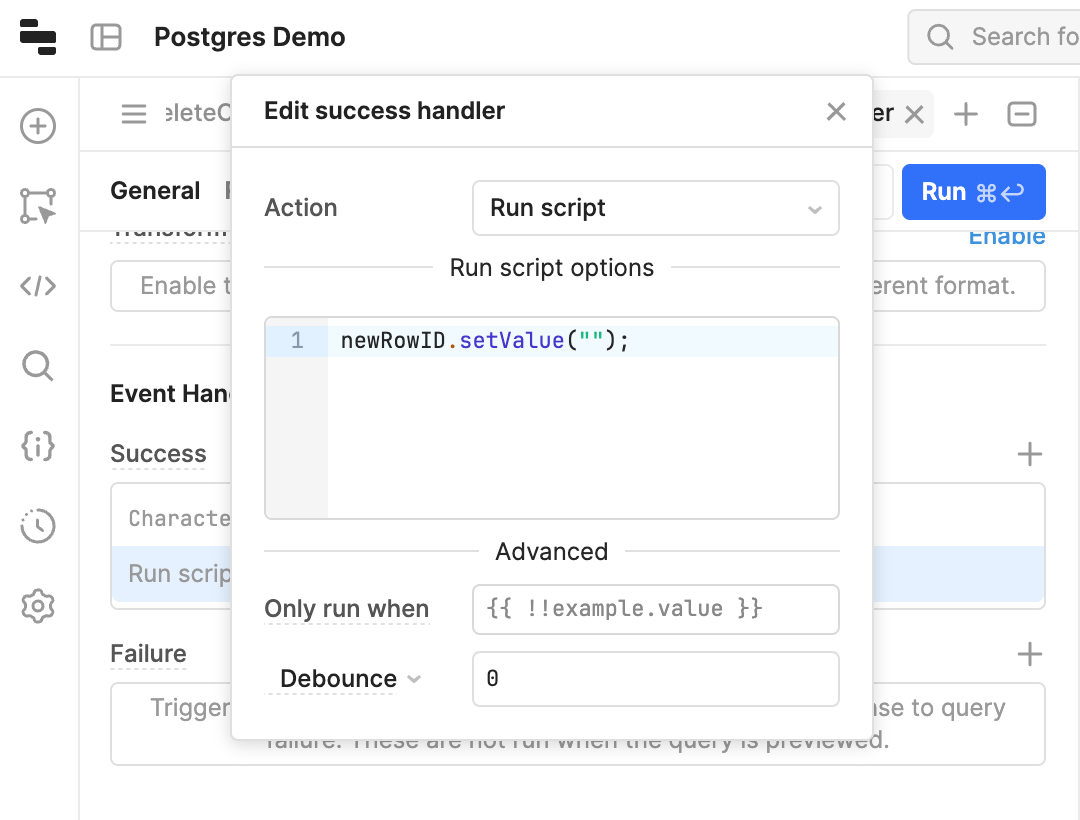
And just like that, the field’s reset.
We can reapply these techniques to other database tables—even all of them—but chances are good that only certain tables in the database deserve this level of attention. Others may be more dormant or may only need read access.
Regardless, the world is your oyster when you create a Postgres GUI. For me, using Retool makes it exceptionally easy to create UI components, rig them to actions, and make dynamic SQL queries to my Postgres database. Using a mixture of Retool’s GUI queries and raw SQL, you can accomplish just about anything efficiently.
Ready to get building a Postgres GUI? Get started. Looking for a template for a Postgres admin panel instead? Check that out here.